


Proven products
from the best producers
from the best producers
from £1100
SSL certificate
Dedicated support
ATTENTION
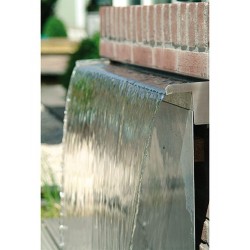
The price above is the price of a 150 cm spout.
If you want to purchase other necessary elements from us (for the proper operation of this fountain/waterfall), here is the list below:
1. LED for spout 150 cm, stainless steel
2. set of connectors, hoses, flow rate regulator
3. pump needed to pump water to the appropriate height (the higher, the higher efficiency pump is needed):
4. tank (the higher we install the waterfall, the larger it is needed - for effective water collection)
7 steps in creating custom cascading structures:
1. Structure planning
2. Select entry option
3. Selecting the right pump
4.Creating a modern, stylish design using a mirror
5.Construction of the tank
6.Lighting
7. Connecting the pump to the cascade
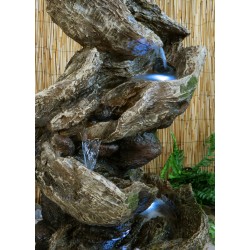
Step 1 - How can you make a cascade?Planning
1. Choice
You can build the cascade into the wall. You need to make sure that the surface you want to place it on is level and easily accessible from the bottom or rear (depending on the inlet option).
2. Drilling
It is not recommended to drill holes in the cascade as water may leak out.
3. Glue
You can use waterproof, strong adhesive to attach to a flat surface or weld to metal components.
4. How high can the cascade be mounted?
At high altitude, water drops will be blown away by the wind, which may cause water loss and frequent refilling.
Therefore, when planning the height, you should take into account the place where you intend to install the cascade (in a quiet place it can be mounted higher).
Realistically, the maximum height is up to 1.5 m, although 2 m is possible.
Step 2 selection of inflow option
The next step in creating a cascade is to select the input option. The following options are available:
- power supply at the back (in the photo on the left)
- power supply from the bottom (in the photo on the right)
It depends on the situation and how you want to mount the cascade. The rear inlet has an inlet at the back of the chamber if you run the hose through the wall at the back. Alternatively, choose the bottom inlet if the hose is routed through a wall (e.g. behind a slab).
Fixing kits
To properly connect the cascade to the pump, prepare the appropriate number of hoses, connectors and splitters (this will prevent uneven flow of water from the cascade).
Step 3 - Selecting the right pump
Once we know what the width and height of the cascade will be, then you need to choose a pump that will be efficient enough for good, consistent water flow. To get the full effect, a lot of water must be pumped into the cascade. Pumps are usually described in terms of "liters per hour" (LPH).
All our pumps have the minimum efficiency specified on the nameplate (unlike many pumps offered on the market, which have significantly higher parameters and, consequently, the pump does not fulfill the task)
Cascade fed from below
Cascade width 30 cm - number of entrances 1
Cascade width 60cm - number of entrances 1
Cascade width 90cm - number of entrances 2
Cascade width 120cm - number of entrances 3
Cascade width 150 cm - number of entrances: 3
Rear-powered cascade
Cascade width 30 cm - number of entrances 1
Cascade width 60cm - number of entrances 1
Cascade width 90cm - number of entrances 2
Cascade width 120cm - number of entrances 3
Cascade width 150cm - number of entrances 3
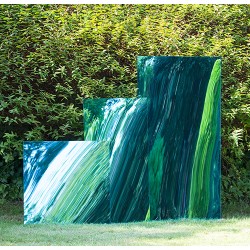
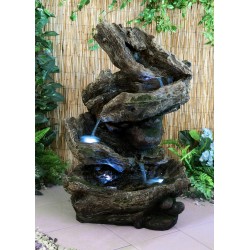
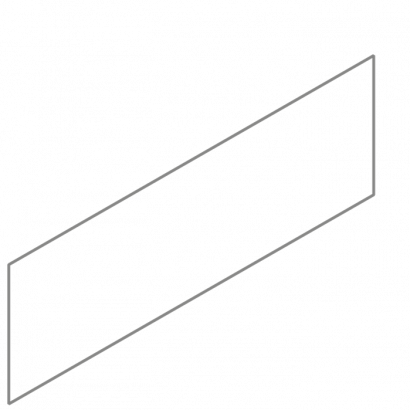
Step 4 - Create modern Mirror effects
From our experience building waterfall cascades, we have found that you can create a really good effect by using a mirror as a support plate for the waterfall.
The water flows in front of the mirror and creates wonderful lighting effects in direct sunlight. We have a range of mirrors available in a variety of sizes and colors.
Our mirrors can be used in many places to achieve different lighting effects and illusions.
Made of acrylic, which is 10 times stronger than glass and is 80% lighter!
Acrylic is difficult to break and is easy to cut, drill, shape, etc.
These mirrors are particularly easy to clean.
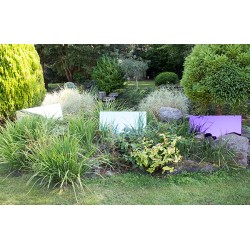
Dimensions and prices of smooth, untinted mirrors:
Small square - 60cm x 60cm (2ft x 2ft)
Small rectangle - 90cm x 44cm (3ft x 1ft 5ins)
Medium rectangle - 120cm x 60cm (4ft x 2ft)
Large Narrow Rectangle - 180cm x 44cm (6ft x 5.5ins 1ft)
Large narrow rectangle - 180cm x 60cm (6ft x 2ft)
Large Rectangle - 180cm x 75cm (6ft x 2ft 6ins)
Extra large rectangle - 180cm x 120cm (6ft x 4ft)
Below are sample prices:
Round (40cm diameter) €29.99
Square (60x60cm) € 39.99
Square, small (90x44cm) € 39.99
Rectangle, medium (120x60cm) € 42.99
Dimensions, availability and exact prices of untinted and tinted mirrors on request
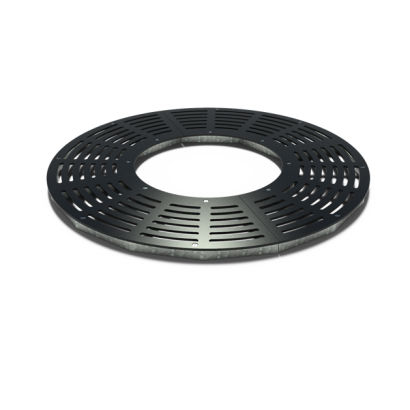
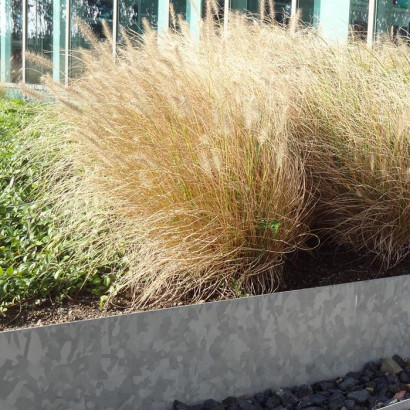
Step 5 - Creating the tank
It is the key to creating your Cascade/Waterfall. The tank that stores water should be large enough to collect all the water flowing from the cascade (otherwise you will lose water and need to refill the water in the tank). One option is to make a tank or buy a ready-made one made of plastic or stainless steel (in the case of a portable cascade or when we do not intend to dig).
We offer tanks made of plastic and stainless steel
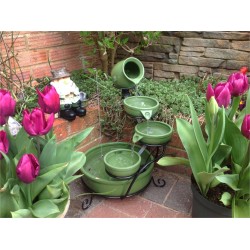
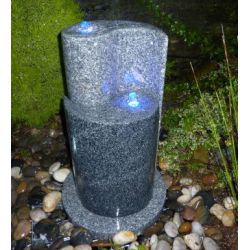
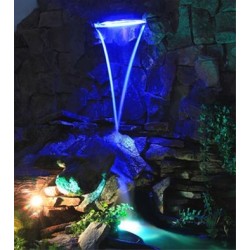
Step 6 - Lighting
You can also add colorful lighting effects to your fountain using our waterproof LED lights.
Step 7 - Connecting the pump and cascade
The pipes extending from the back or bottom of the cascade are approximately 1.1 inch (3 cm) internally threaded. We supply a threaded 25mm stub for easy connection of the cascade outlet to a 25mm hose. Please note that for larger widths of 90cm and above there is more than one pipe at the back - so you will need to use a hose splitter (2-out or 3-out) to connect one pump to the cascade.
Easy assembly.
A solidly made product for the German market
Warranty 2 years.

Data sheet